
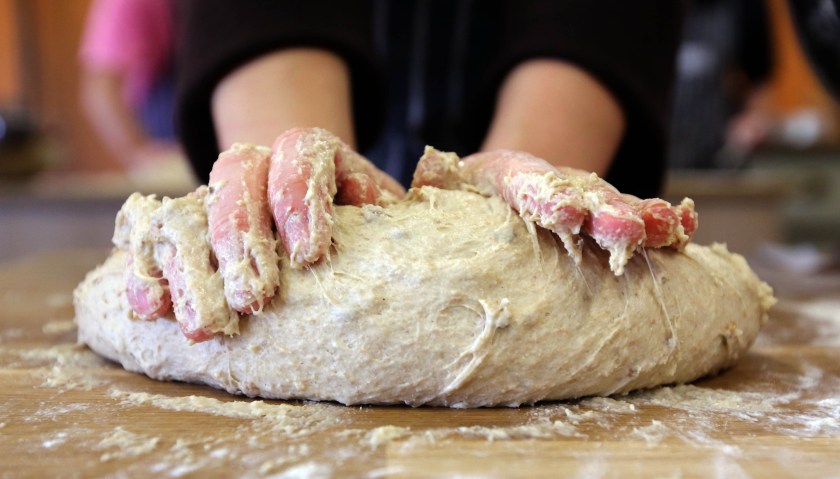
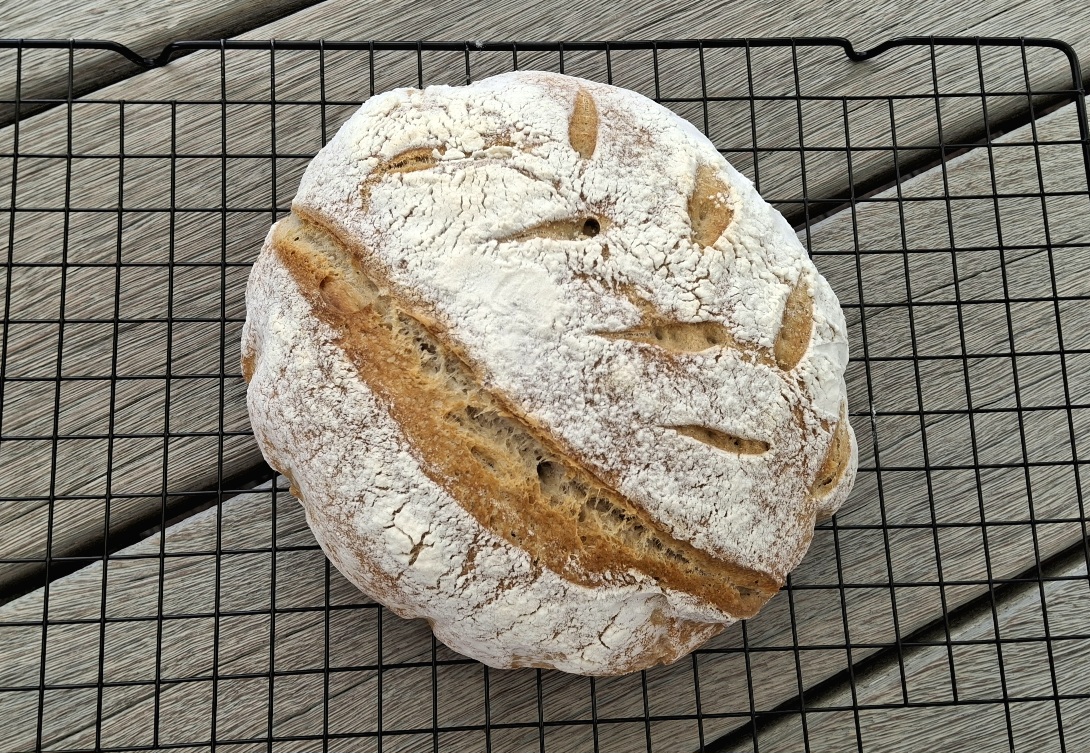
I missed the COVID craze for making sourdough. I didn’t have a starter, and growing one from scratch was too tricky for me, so my first attempts turned out terrible. A couple of weeks ago, a friend offered me her starter, and I decided to give it a go. This time, I found sourdough is easier than it looks. With an active starter and a bit of patience, simple ingredients can turn into a rustic loaf with a soft interior and crunchy crust. There’s no single “right” way—every loaf is different.


Sourdough Bread Making Process
This recipe uses a slow, relaxed method that fits into a normal day. Feed the starter and leave it on the bench to activate, then head out for a coffee. When you get back, mix the dough and give it a few stretch-and-folds to build strength without kneading. In the late afternoon, after it has risen on the bench, shape the dough and refrigerate it overnight. The next day, bake it straight from the fridge in a hot, covered pot—the lid traps steam and gives the bread its classic crisp crust.
My Take on the Recipe
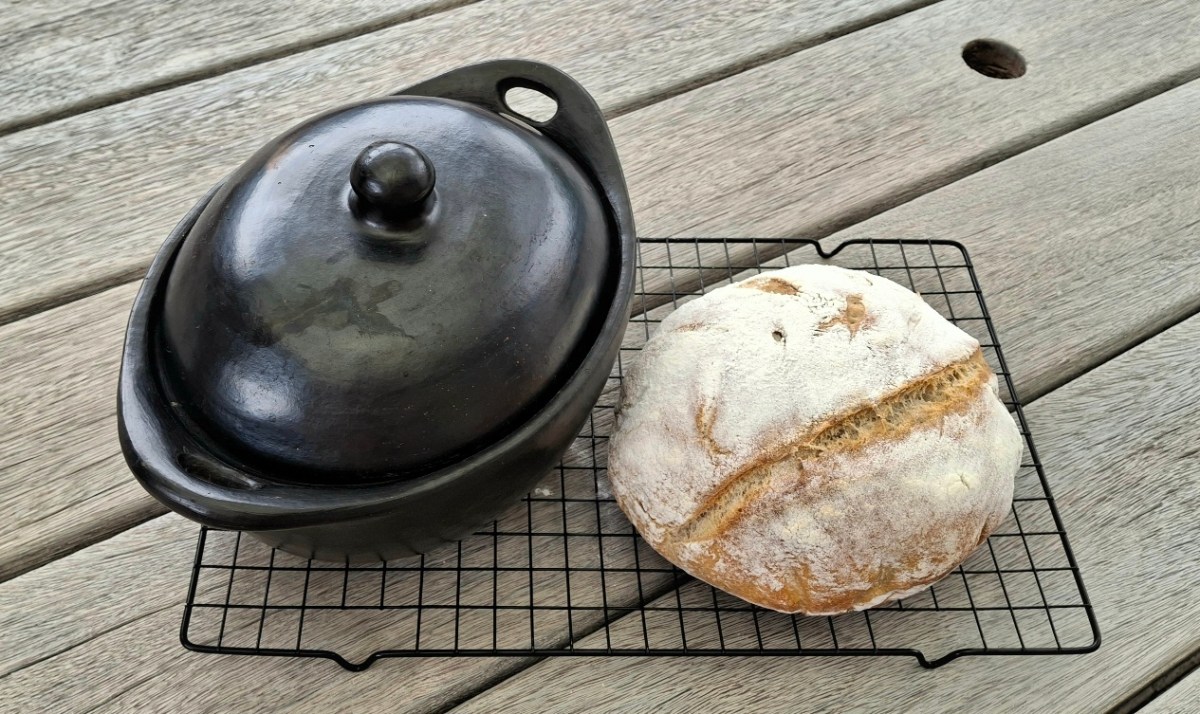
I’m still new at this, and some of my early loaves were a bit dense. I started off using what I had on hand, including baking in my La Chamba clay pot. It worked reasonably well, although not perfect, likely because it is slightly porous.
For scoring, I used a craft knife to begin with, but I have since ordered a proper one from AliExpress, along with a couple of proofing baskets. I also went a bit heavy on the rice flour dusting early on and had to brush some off before serving.
My first loaf followed a basic recipe and was baked in a standard casserole dish — the La Chamba, not cast iron. For the second, I tried an open bake and added 250g of rye flour from Binn Inn, with high-grade flour for the rest. To be honest, the rye did not work well for me and contributed to a heavier loaf. I have since learned about the scalding method for using rye, which I may try another time.
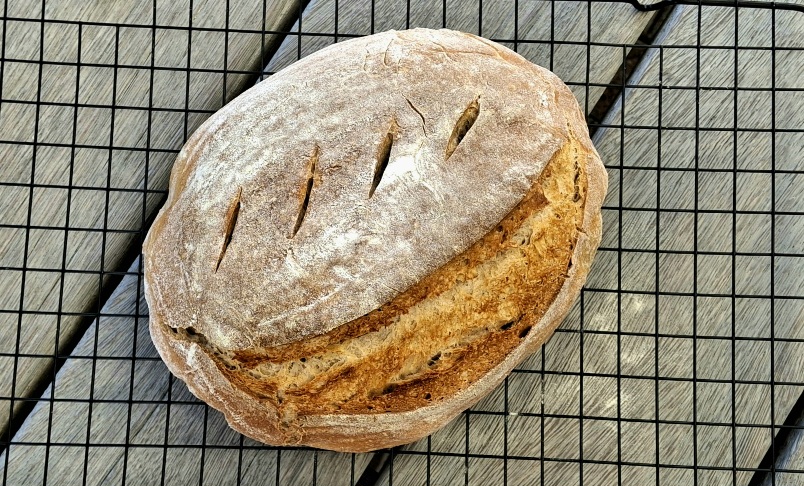
My third attempt used a smaller amount of rye, about 100g, again combined with high-grade flour, and this time I baked it in my new cast iron Dutch oven. This made a big difference. The bread came out much better, with a lovely texture and even bake.
For now, I’ve decided to leave rye aside and focus on getting a really good wholemeal sourdough. That’s my next mission.
Another thing on my list is to try New Zealand-grown wheat, such as the flours from Humble Flour, which I believe are also available at Farro. It’s nice to use homegrown ingredients. Their website mentions whole wheat flour, which includes all three parts of the grain, whereas supermarket “wholemeal” flour usually has the germ refined and the bran added back. Good to know when experimenting with different flours.
Basic Recipe
Recipe Card
To print the recipe, simply click the ‘Print’ button below and save your PDF for easy reference!
Simple Overnight Sourdough Bread (Summer Method)
A relaxed sourdough method that fits into a normal day. Feed your starter in the morning, shape in the evening, and bake fresh bread the next day.
Ingredients
- 70g starter
- 70g water
- 75g flour (wholemeal and/or high grade)
- 150g active starter
- 25g olive oil
- 275g water
- 500g high grade flour
- 10g salt
𝗙𝗲𝗲𝗱 𝗦𝘁𝗮𝗿𝘁𝗲𝗿:
𝗠𝗮𝗸𝗲 𝘁𝗵𝗲 𝗗𝗼𝘂𝗴𝗵:
Directions
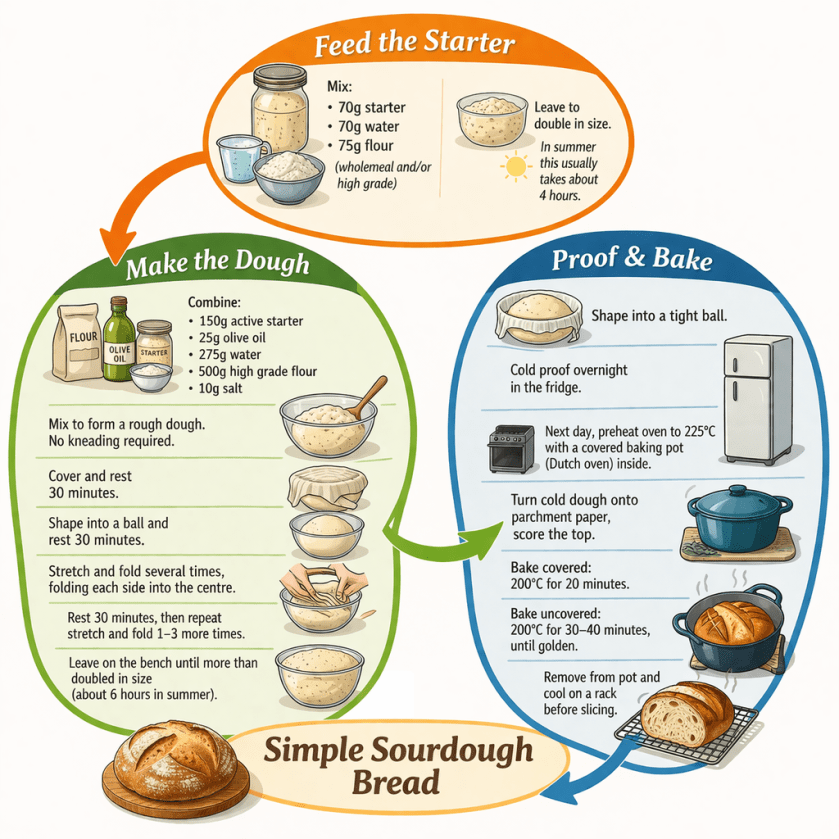
- Feed the Starter: Mix 70g starter, 70g water and 75g flour. Leave to double in size. In summer this usually takes about 4 hours.
- Mix the Dough: Combine 150g active starter, olive oil, water, flour and salt. Mix to form a rough dough. No kneading is required.
- Rest the Dough: Cover and rest for 30 minutes.
- First Shape: Shape the dough gently into a ball in the bowl and rest another 30 minutes.
- Stretch and Fold: Stretch and fold the dough several times, folding each side into the centre.
- Repeat: Rest 30 minutes and repeat the stretch and fold 1–3 more times.
- Bulk Ferment: Leave the dough on the bench until more than doubled in size (about 6 hours in summer).
- Final Shape: Shape the dough into a tight ball using a gentle push–pull motion on the countertop.
- Cold Proof: Place the dough into a tea towel–lined bowl and refrigerate overnight.
- Preheat: The next day, preheat the oven with a covered baking pot inside to 225°C.
- Prepare the Dough: Turn the cold dough onto a large piece of parchment paper to make it easier to lower into the hot pot. Score the top of the bread.
- Bake Covered: Place dough into the hot pot with lid on. Reduce oven to 200°C and bake for 20 minutes.
- Bake Uncovered: Remove the lid and bake for another 30–40 minutes until golden.
- Cool: Remove from the pot and cool on a rack before slicing.
Nutrition
Per Slice (approx): 160 calories; 3 g fat; 28 g carbohydrates; 5 g protein.Sourdough Hydration
A Note About Hydration
Hydration in sourdough baking is the amount of water relative to flour, expressed as a percentage. For example, 80 % hydration means 800 g of water for every 1 000 g of flour. Hydration affects both how the dough feels and the texture of the finished bread.
- Lower hydration (60–70 %) produces a firmer, easier-to-handle dough with a tighter crumb and smaller holes.
- Higher hydration (75–80 %) gives a softer, stickier dough and a lighter, airier loaf with larger, irregular holes.
- Very high hydration doughs are more challenging to shape and handle, especially for beginners, because the wet dough is sticky and slack.
At 80 % hydration, the crumb will be very open and airy, but the dough will be much stickier than at 75 %, requiring a gentler touch and more confidence to handle. Most bakers begin around 70–75 % hydration and gradually increase it as their skills improve, balancing an open crumb with easier handling.
Sourdough Baker’s % Hydration Calculator
Use this interactive sourdough calculator to experiment with different flour weights and hydration levels — all ingredient amounts will update automatically.
👉 Download: Free Sourdough Calculator
Prefer to work offline? After saving, go to: File → Download → Microsoft Excel (.xlsx)
Hydration guide:
- 75 % → firmer dough, tighter crumb
- 80 % → stickier, more open crumb
- 85 %+ → very soft, harder to handle
Sourdough Starter Care
What To Do With Your Starter After Baking
Once you’ve taken the starter you need for your bread, simply feed the remaining starter again with equal parts flour and water. Many bakers keep a small amount (about 50–100g) in the jar and feed it to refresh the yeast.
Let it sit at room temperature for a couple of hours so it becomes active again, then place it in the fridge where it will slow down and only need feeding about once a week. When you want to bake again, take it out, discard some if it has grown too large, and feed it to wake it up.
You don’t need to wash the jar every time—many people just scrape down the sides and keep using it—but giving the jar a proper clean every week or two helps prevent dried build-up and keeps everything tidy.
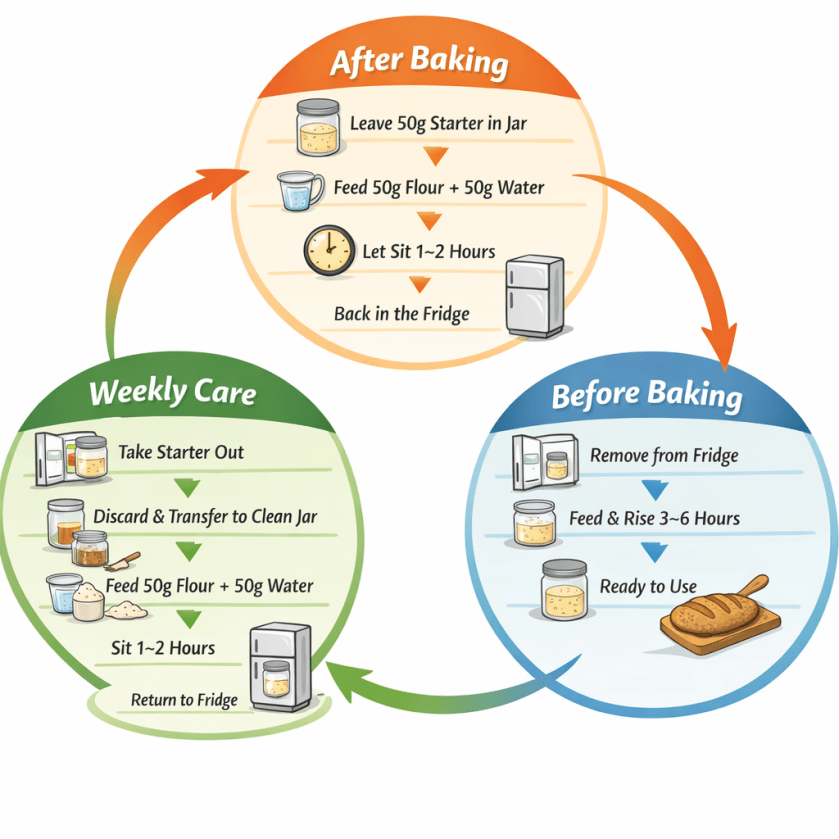
After Baking
- Leave a small amount of starter in the jar (about 50g, or even just 1–2 tablespoons if that is all you have).
- Feed it with 50g flour and 50g water.
- Let it sit on the bench for 1–2 hours so it starts bubbling.
- Then place it back in the fridge.
If You Are Not Baking
- Take the starter out of the fridge once a week.
- Discard most of the starter, leaving about 50g (roughly 1–2 tablespoons).
- If the jar is getting messy or crusty, transfer the 50g of starter into a clean jar.
- Add 50g flour and 50g water.
- Mix well.
- Leave it on the bench for 1–2 hours so it becomes active again.
- Return the jar to the fridge.
Before Baking Again
- Take the starter out of the fridge.
- Feed it according to the recipe and let it fully rise and become active (usually 3–6 hours depending on temperature).
- Then use what you need for your recipe.
Sourdough Timeline
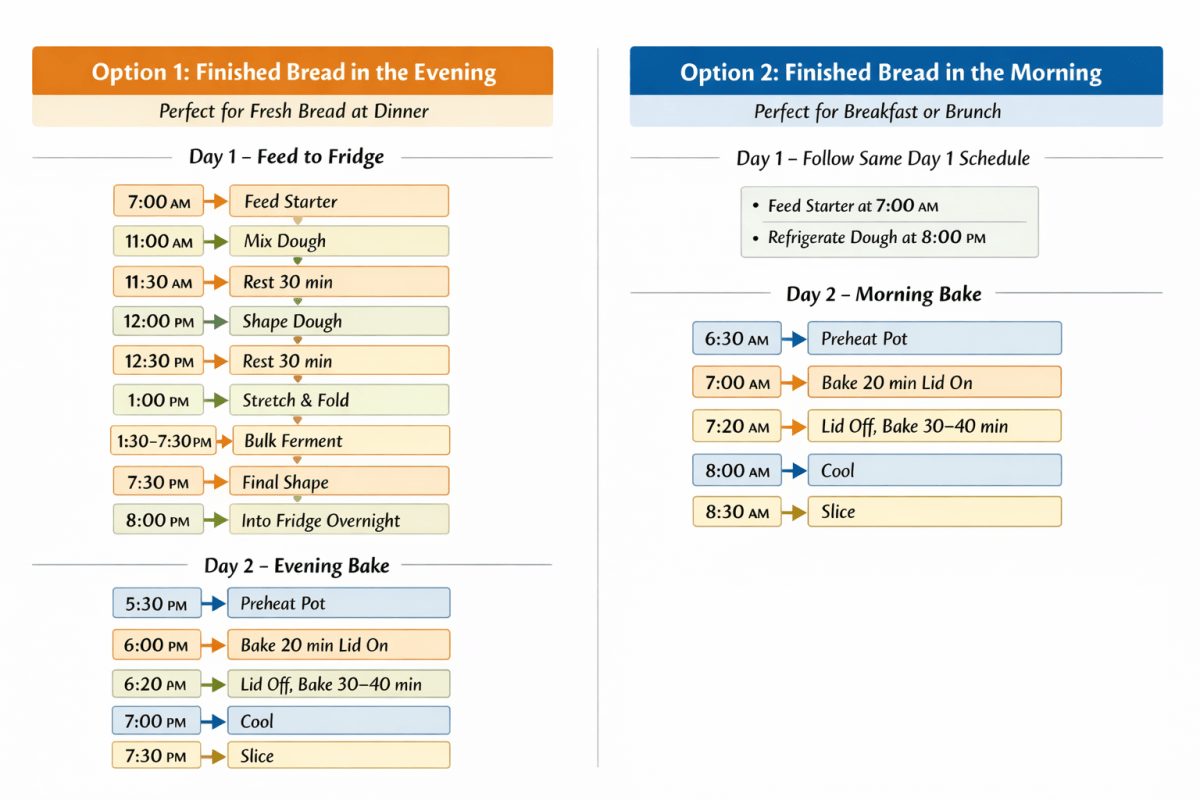
Which Is Easiest?
Feed at 7:00am → Fridge at 8:00pm → Bake next day when it suits you.
Once chilled, the dough is very forgiving.
Morning, afternoon, or evening all work well.
📌 Don’t lose it — Pin it! Save this recipe to Pinterest or share it with a friend so you can find it again. ♡ Janet
Discover more from Life With Janet
Subscribe to get the latest posts sent to your email.

