

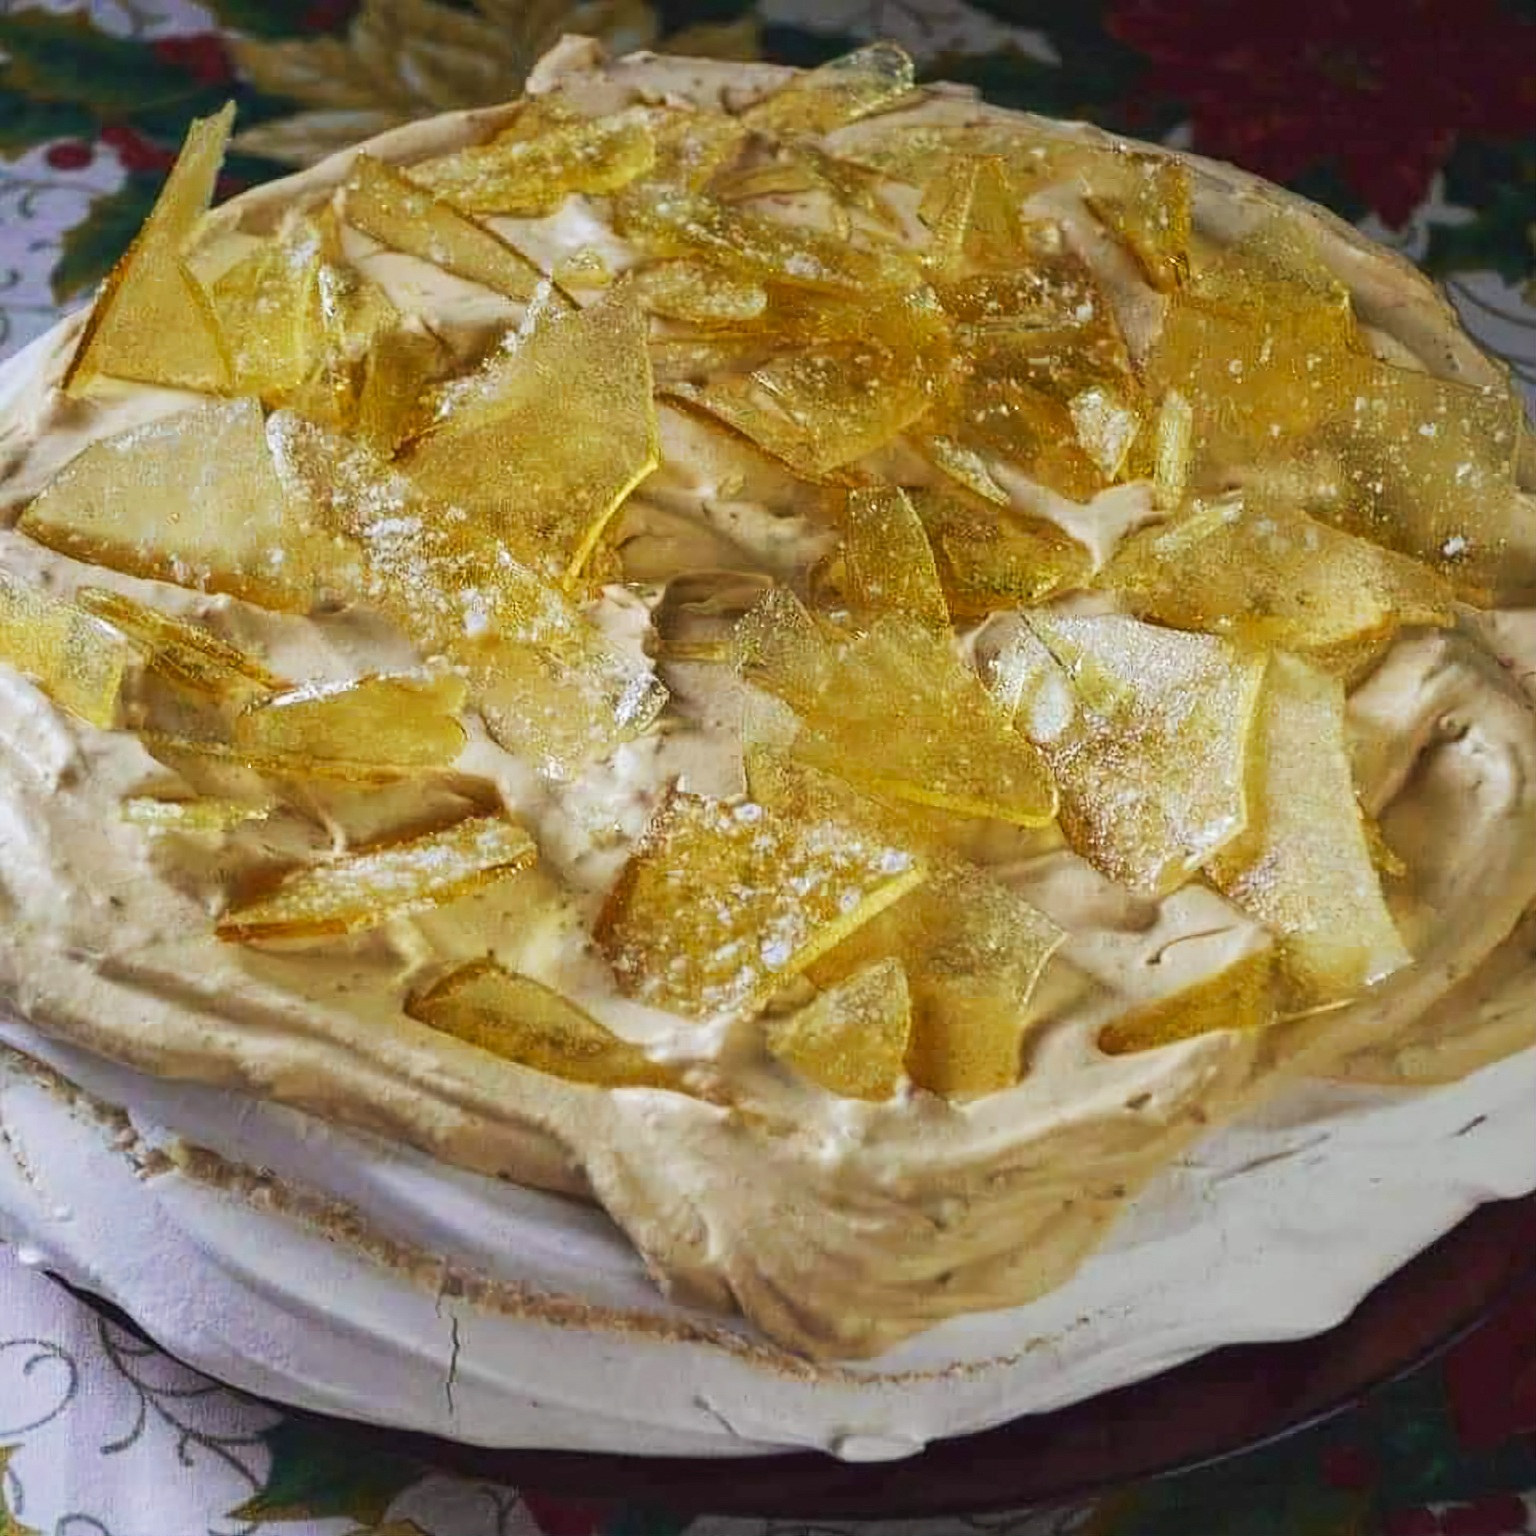
I made this delicious pavlova using my basic pavlova base recipe. Instead of the usual fresh berries and kiwifruit, I topped it with a rich, creamy caramel, whipped cream and then added some salted caramel shards that are sticky and toffee-like. It’s a real treat for your taste buds.
Cut the pavlova into small wedges for a satisfying burst of sweetness in every bite. It’s a very sweet dessert, so smaller portions are best, but don’t worry—you can always go back for more!
The Way I Make Pavlova
If you’re in a rush, I recommend baking the pavlova base the night before and leaving it in the oven to cool overnight. In the morning, you can simply transfer it to a plate and cover it with tin foil until you’re ready to serve.
If you don’t need a large pavlova, it’s easy to halve the recipe. Just use half the ingredients and bake it as usual, and you’ll still get a perfect pavlova.
What I’ve found works well is making the pavlova base up to three days ahead. Just leave it uncovered on a plate, lightly tented with foil, and store it in the pantry. It stays fresh and ready to go.
I always have trouble with getting the pavlova to fit my serving plate, so here’s a little trick I use: Turn your serving plate upside down on a sheet of baking paper and trace around it. Then, flip the paper over and use the outline as a guide for shaping your pavlova.
A big tip is not to add your toppings too early—aim to add them no more than three hours before serving. Adding them too early might make the base go soft, and we definitely don’t want that!
As for leftovers, I store them in the fridge, but they can get a little soggy. However, they still taste fantastic the next day, especially if you top them with a scoop of ice cream when no one’s around to see!
And don’t be afraid to get creative with the toppings. I love to try different combinations like fresh berries, cream, ambrosia, lemon curd, or even rhubarb and custard. It’s fun to use what’s in season and experiment with new flavours!
How I Finish Off My Pavlova
For the topping, I mix 3 tablespoons of whipped cream into the caramelized condensed milk. This makes it smooth and creamy, and perfect for spreading over the pavlova.
Once I’ve spread that on top, I spoon or pipe the remaining whipped cream over the mixture to finish it off and make it look lovely.
Just before serving, I always scatter the caramel shards on top for that extra crunch and texture. They really take the pavlova to the next level!
How I Make Salted Caramel Shards
I tend to make the salted caramel a few days ahead, up to three days in advance. Just store it in an airtight container, and it will stay crisp.
When I make the caramel shards, I combine sugar and water in a saucepan and heat it gently. I swirl the pan to melt the sugar until it’s clear, then turn up the heat and let it boil until it turns golden.
I don’t stir the caramel—just gently swirl the pan, as stirring can cause it to crystallize and turn grainy. And it’s really important to keep a close eye on it toward the end because it can burn quickly.
Once it’s golden, I pour the caramel onto a silicone mat or lined tray and spread it out thinly. I sprinkle sea salt flakes on top right away, then let it set.
After it cools and hardens, I break it into chunky shards, which add a gorgeous crunch.
Just a little note: The caramel shards are quite sharp—beautiful, but brittle like glass. So, be sure to let your guests know, especially if there are kids or anyone with sensitive mouths!
Recipe
To print the recipe, simply click the ‘Print’ button below and save your PDF for easy reference!
🍮🍬🍰🇳🇿✨🥄💖
Salted Caramel Pavlova

A sweet twist on the classic Kiwi pavlova – topped with whipped cream, a smooth caramel swirl, and crunchy salted caramel shards.
- 𝗧𝗶𝗽𝘀:
- Make the pavlova shell ahead and store in an airtight container once cooled.
- Only add toppings just before serving to keep it crisp on the outside.
- If you don’t have caramelised condensed milk, you can boil a tin of regular sweetened condensed milk for 2 hours.
Recipe Credit: From a magazine clipping dated December 2012 — no publication name recorded.
Ingredients
- 6 egg whites, room temperature
- 2 cups caster sugar
- 2 Tbsp cornflour
- 1 Tbsp malt vinegar
- 1 tsp vanilla essence
- 400g caramelised condensed milk (e.g. Nestlé Caramel)
- 300ml cream, whipped
- 2 cups sugar
- ½ cup water
- 2 Tbsp flaky sea salt
𝗣𝗔𝗩𝗟𝗢𝗩𝗔 𝗕𝗔𝗦𝗘:
𝗧𝗢𝗣𝗣𝗜𝗡𝗚:
𝗖𝗔𝗥𝗔𝗠𝗘𝗟 𝗦𝗛𝗔𝗥𝗗𝗦:
Directions
- Make the Pavlova: Preheat oven to 180°C. Beat egg whites until soft peaks form. Gradually add sugar, 1 tablespoon at a time, beating well after each addition until thick and glossy.
- Fold in Extras: Add cornflour, vinegar and vanilla. Fold in gently.
- Shape & Bake: Line a tray with baking paper and spoon mixture into a circle. Smooth sides and top. Reduce oven to 130°C and bake for 1 hour. Leave to cool completely in the oven with door closed.
- Make Caramel Shards: Place sugar and water in a saucepan over medium heat. Stir gently until sugar dissolves. Bring to the boil without stirring and cook until golden. Pour onto a baking paper–lined tray or silicone mat. Sprinkle with flaky salt. Once set and cool, break into shards.
- Prepare Topping: Loosen the caramel slightly by microwaving for 10–15 seconds if needed. Mix about 3 tablespoons of the whipped cream into the caramel to lighten it.
- Assemble: Place pavlova on a serving plate. Spread caramel cream over the top. Then dollop or pipe the rest of the whipped cream on top. Decorate with caramel shards just before serving.
Nutrition
~370 kcal | 4g protein | 17g fat | 53g carbs | 51g sugar | 160mg sodium (per serve)Don’t lose it — Pin it! Save this recipe to Pinterest or share it with a friend so you can find it again. ♡ Janet
Discover more from Life With Janet
Subscribe to get the latest posts sent to your email.

